![logo-white.png]](https://knowledge.benq.com/hs-fs/hubfs/logo-white.png?width=50&height=50&name=logo-white.png)
Index:
- X-Sign Broadcast Setup
- Creating Raptor Configuration
- Creating All Clear Configuration (Resolved)
- Testing your Raptor Configurations
[Instructions]
X-Sign Broadcast Setup
- Confirm that your X-Sign Broadcast Settings app is updated to the latest version.
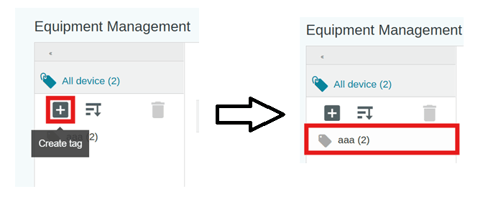
- Create a Tag Group within Broadcast that will be the desired endpoint for your Broadcast.
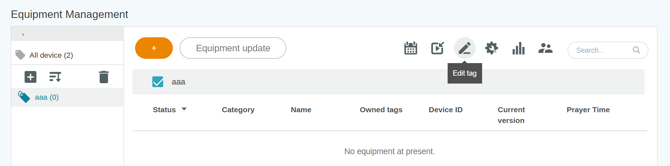
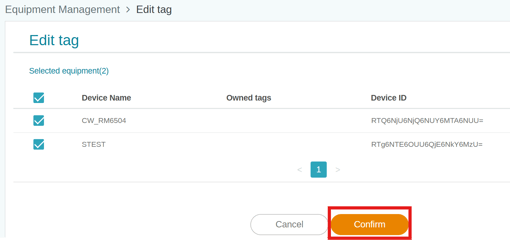
- To assign device(s)to a Tag, select the Tag Group and click Edit tag. Select all the devices that you want to assign to the group and click Confirm.
Those devices should now show up under the Tag.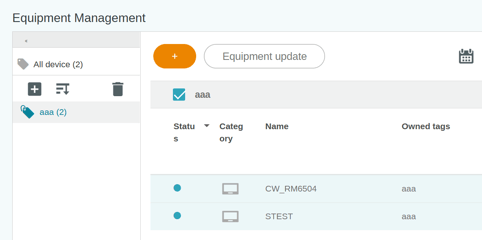
X-sign Broadcast Informacast Settings
- Navigate back to All device > Device Control
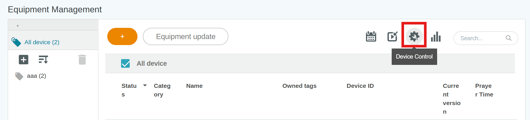
- Under Emergency Settings
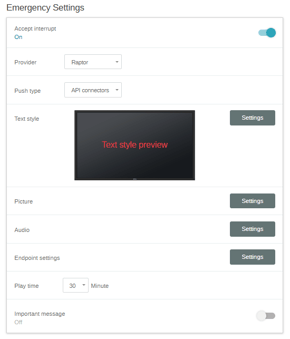
- Provider > Raptor.
- Interrupt > ON.
- Push Type > API connectors.
- Set Text Style Settings.
- Picture > Settings > Add. To ensure best quality image that fills the display, use a 3840x2160 resolution image file. Once uploaded, copy
 the MD5 value to a text file as you'll need this later on. Click OK when done.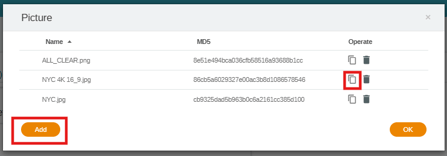
- Repeat the process for Audio as above.
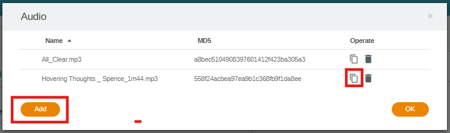
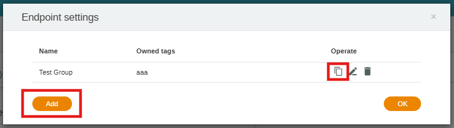
- Endpoint Settings > Add > Select required Tag Group. Copy the Endpoint URL to the same text file as the others as you'll need it later on as well.
- Adjust Play Time and Toggle Important Message (user cannot close broadcast at the board side) as needed.
- Scroll down to the bottom and click Apply.

Creating Raptor Configuration
- Login to https://admin.icmobile.singlewire.com/.
- Admin > Configurations and click Add Configuration.
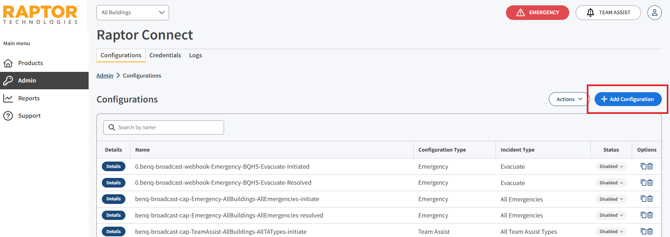
- Create a Configuration.
Set Configuration Type > Emergency and Name your Event (this will be your event initiator e.g Test-Scenario-Initiate).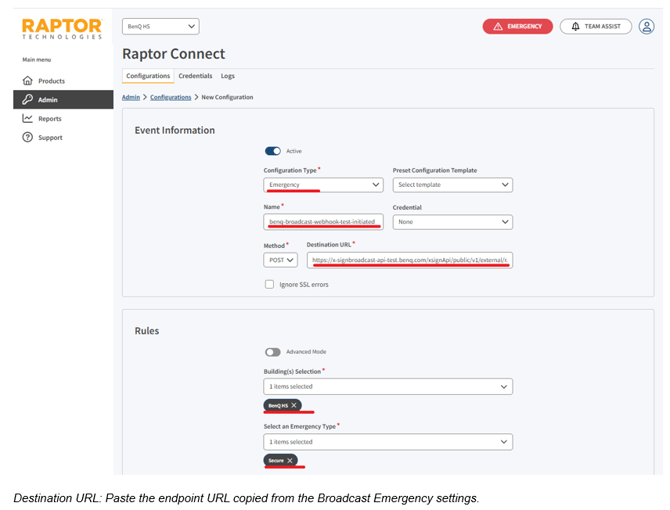
- Select
- Buildings(s) to receive this event.
- Emergency Type
- Optional Status > Initiated
- Payload >
{
"background":"45a56aaf1fb61ca520b480e314ca297e",
"audio":"558f24acbea97ea9b1c368fb9f1da8ee",
"text":"Emergency Alert from Raptor + BenQ"
}
Example payload above. The background and audio fields must be filled with the MD5 values of the pictures and audio configured in the Broadcast Emergency settings.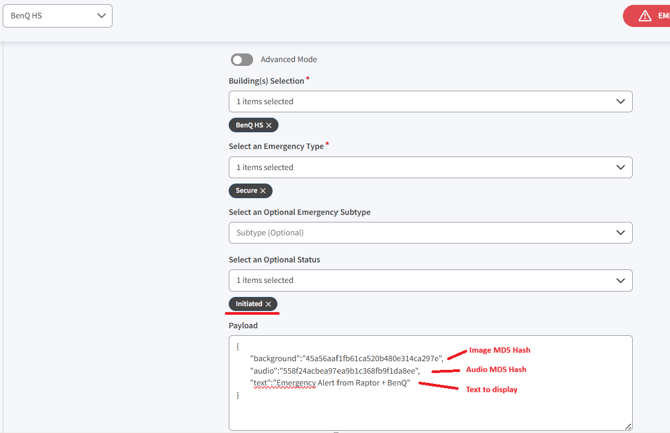
- Click Save.
Creating All Clear Configuration (Resolved)
-
Repeat the steps above to Create a Configuration, but name this one differently to differentiate it from the initiating event configuration. (e.g. Test-Scenario-Resolved).
-
In the Payload of the Event Configuration, you'll send the parameters for "allClear":"false" instead of the content settings (background/audio/text). Make sure to use the same Endpoint URL as your scenario for the Webhook URL.
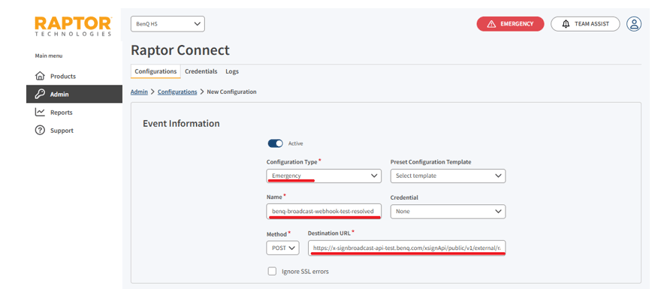
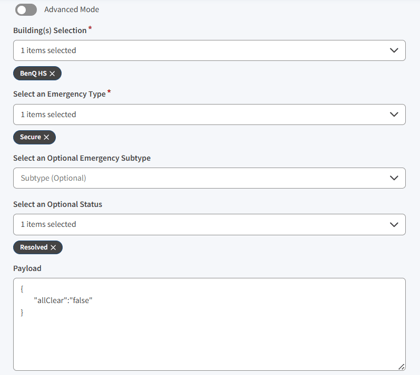
- Click Save.
Testing your Raptor Configurations
- Test Emergency Initiated
- Select your Building.

- Confirm your events are Active, then click EMERGENCY.
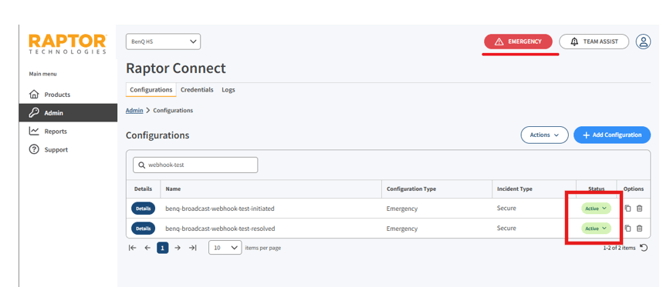
- Select your Emergency Type and click Initiate.
Since we set our Event to Secure (see Creating Raptor Configuration), we want to choose Secure. If your Emergency Type was another option, choose THAT option.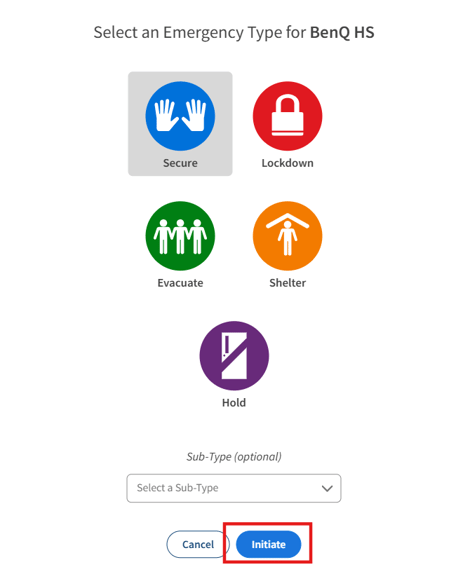
- Emergency Event should be displayed under Incidents.
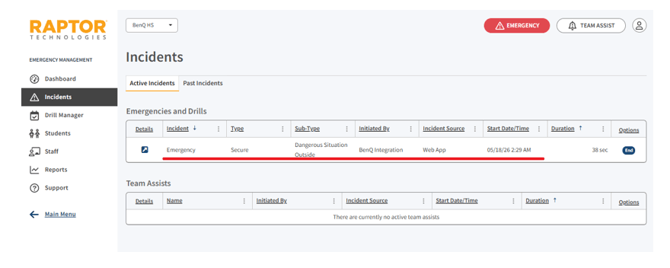
- Select your Building.
- Test Emergency Resolved
- Click End to end your initiated Emergency Event.
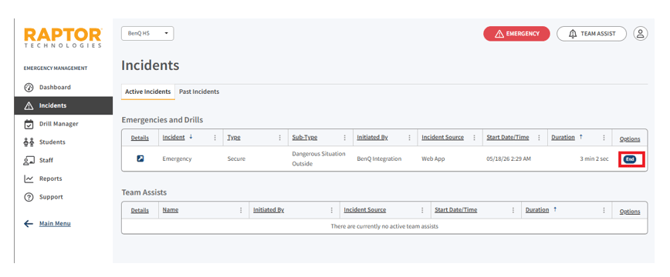
- Confirm ending the Emergency Event.
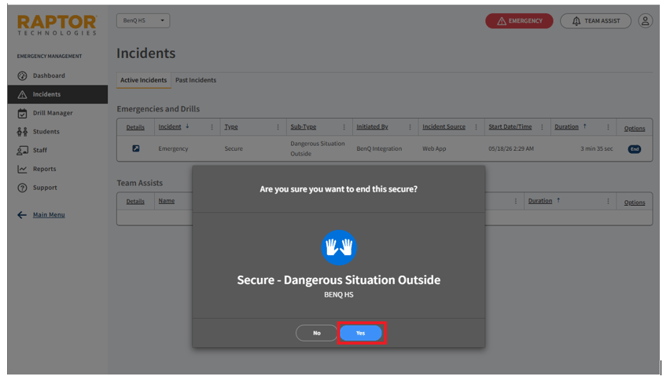
- Click End to end your initiated Emergency Event.
If you have any questions or issues with the setup, please reach out to your BenQ representative/contact and they'll be able to assist.