The article (step 2) assumes that you have already completed the first steps of setting up your BenQ cloud infrastructure. If this has not been completed, please refer to the first steps.
Here is a glossary of the acronyms and terms we will be using in this step 2 article.
- DMS (Device Management Solution) The BenQ Cloud Service for remotely managing your devices.
- AMS (Account Management System) BenQ Cloud Service for managing user interactions with BenQ BOARDs.
- Binding: process used to establish a connection between your organization’s BenQ cloud services and your BenQ boards, allowing remote management.
In this document we will cover the three ways to add your BenQ boards to your Device Management Solution. It is important that no matter how you bind your boards that you establish a clear and concise naming convention so that you will easily identify your boards and their locations.
Here are your options:
- Method #1: If you would like to manage your devices from the cloud and turn on AMS services which allow users sign-in with their BenQ user accounts.
- Method #2: If you purchased our RP series boards, you can bind your BenQ boards to your Device Management System using an NFC card.
- Method #3: If you would like to manage your devices from the cloud but do not want to create BenQ user accounts. Users don't sign in to work on the board.
Before you start this process, please update the board with the latest firmware version. This can be done through Settings, About, System Updates, Update System, Check for Update. If an update is available, please download and install it. Once the board has rebooted go to the BenQ App Store. Go to the update tab and update the DMS client app. Download and install any other updates that are available in the store. Once this is completed, reboot the board by holding the power button for 5 seconds and tapping the confirmation message to initiate shutdown.
If you cannot download the latest firmware update or see any apps in the BenQ App Store your organization's network security may be blocking access to our servers. Please send our whitelisting document to your IT administrator.
Method #1:
If you would like to manage your devices from the cloud and turn on AMS, which allows users to sign-in with their BenQ user accounts.
(1) Download the BenQ DMS app to your mobile device.
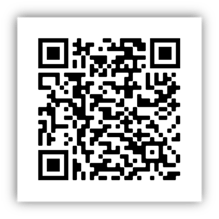
- For Android users, scan this QR code or click this link to be redirected to the Google Play Store

-
For iPhone users, scan this QR Code or click this link to be redirected to the App Store.
(2) Install the BenQ DMS app on your device > use your BenQ Cloud Services
admin credentials to log in when prompted.
(3) From your BenQ board, tap the avatar in the bottom left hand corner > toggle AMS ON. You will be prompted to enter a username and password: default for both is admin
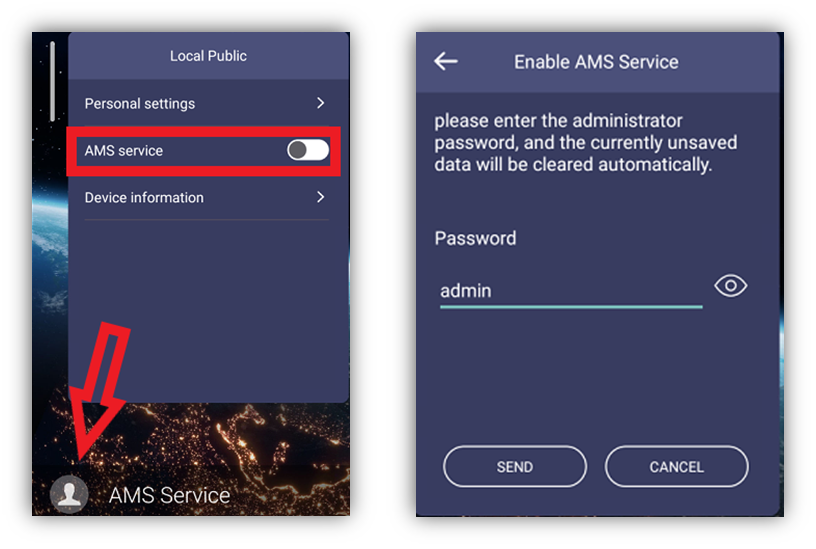 (4) You will be prompted to change the default password for the local admin
account.
- If you would like to keep the default values tap the cancel button.
- If you would like to change the password enter the new values and tap send (this can also now be changed through DMS later on).

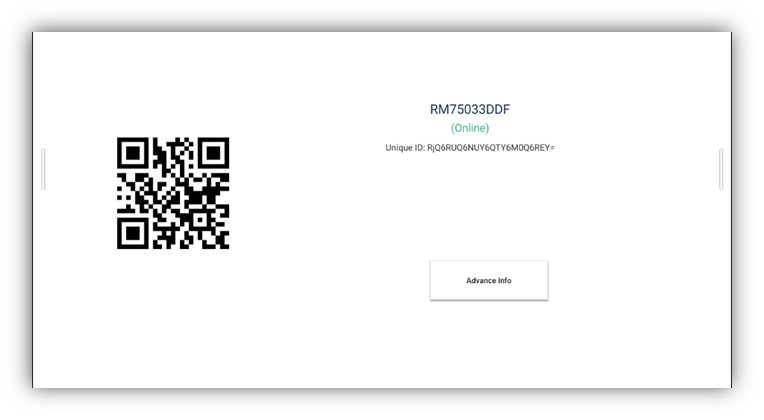
(5) A QR code will appear on screen. From the DMS app on your mobile device >
click on the + icon to open the QR code scanner > scan the on-screen QR code.
(6) You can now give your board a name using the convention that you have established. Please do not rely on the Description field to identify your Board. The Name Field of the board should allow you to easily identify its location.
If you do not have a mobile device on hand, you can tap the keyboard icon under the QR code to manually enter your password > enter your admin username and password > the board will now be bound to your BenQ cloud services.

Renaming your BenQ Board
(1) If you need to rename your board, go to DMS > sign in using your administrator account > under Devices, you will find the board that was recently bound under All Devices.
**Please do this before proceeding to bind the next BOARD.**

(2) If you have multiple boards and cannot identify a specific one > tap on the avatar on your board, then Device Information to see current board names.

(3) Find the matching device name and tap the ![]() icon for that device.
icon for that device.
![]()
(4) Under the Status tab > About > Device name > Edit > Rename the device.

(5) Congratulations your BenQ Board is now bound to your organizations cloud
services.
Method #2 (only available on the BenQ Boards with NFC capabilities ([RP models and RM04])
If you purchased our RP (RM04) series boards, you can bind your BenQ boards to your Device Management Solution using an NFC card.
(1) To bind your boards using the NFC card method > go to BenQ AMS > User Settings
(2) Bind a BenQ NFC card to your cloud services administrator account. To do this double click the administrator account > enter the serial number of the BenQ NFC card (printed on the card) into the field and click the bind icon.

(3) You will also need a separate device to access your DMS through a browser
(4) To add your board, simply tap the NFC card that was bound earlier on the reader (this will add the board to DMS and turn on AMS services).
(5) You will be prompted to enter the default admin username and password.
**Default for both: admin** **
(6) You can now change the default password for the local administrator account. If you would like to keep the default values tap the cancel button. If you would like to change the password enter the new values and click save.
(7) To give your board a descriptive name, go to BenQ DMS > sign into your administrator account. Under All devices you will find the board that was recently bound > select your BenQ board and select the ![]() > Status > About > Device name > Edit the name field to change the name of your board.
> Status > About > Device name > Edit the name field to change the name of your board.
**Please do this before binding the next board.**
(8) If you have multiple boards and cannot identify a specific one > tap the avatar,
then Device Information to see the board’s current name.
(9) Congratulations your BenQ board is now bound to your organizations cloud
services.
Method #3:
If you would like to manage your boards from the cloud but not give users the ability to log in, use this method.
(1) Download the BenQ DMS app to your mobile device.
- Android users: scan this QR code or click this link to be redirected to the Google Play Store
- iPhone users: scan this QR Code or click this link to be redirected to the App Store.
(2) Install the BenQ DMS app on your device > use your BenQ Cloud Services
admin credentials to log in when prompted.
(3) Go to applications on your BenQ board and open the DMS Client app.

(4) From the DMS app on your mobile device > click on the + icon to open the QR code scanner > scan the on-screen QR code.
(5) You can now give your board a name using the convention that you have established. Please do not rely on the Description field to identify your board. The information in the Name field of the board should allow you to easily identify its location.
From the DMS site you can also add a board manually using Unique ID. Navigate to the Devices tab, choose the Group to add the device to and click

(6) Choose Individual or Bulk Enrollment. Enter the Unique ID and Device name into the fields and hit Finish.

(7) Congratulations your BenQ board is now bound to your organizations cloud services.